作为整个课程的一部分,今天进行gitlab与sonarqube相关集成的详解,以及利用现有机制进行项目管理的思路。配置的过程中以一个maven的案例作为介绍,实现与gitlab CI的集成。最后将权限配置进行了说明,以满足多人、多项目使用的场景。其中的配置并不是固定的,各位可以结合自己实际的情况进行修改。
sonarqube的官方文档,大家可以参考看下。
https://docs.sonarqube.org/latest/instance-administration/authentication/gitlab/
https://docs.sonarqube.org/latest/devops-platform-integration/gitlab-integration/
一、sonarqube与gitlab的认证对接配置(authentication)
首先需要前往gitlab配置一个OAuth app,管理员账号>偏好设置>应用
此处scope说明:
api: 假如需要启用group同步。
read_user :假如需要进行用户的鉴权。
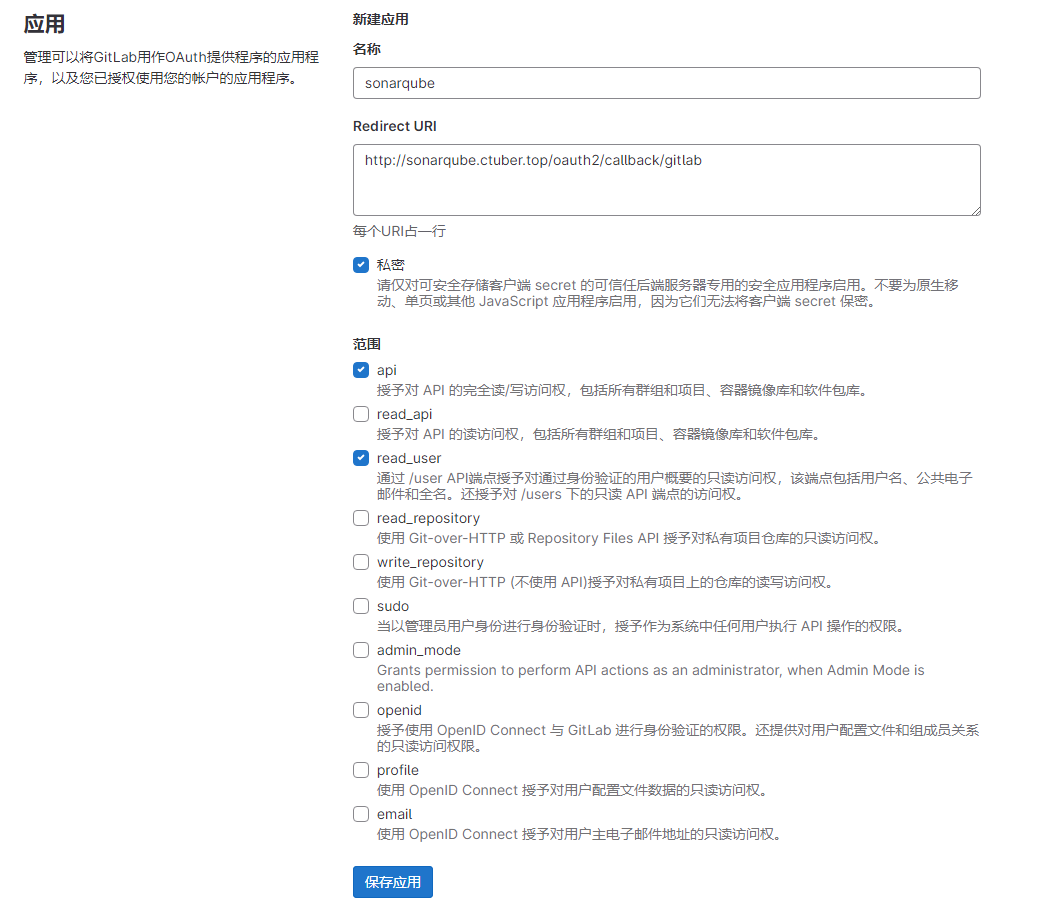
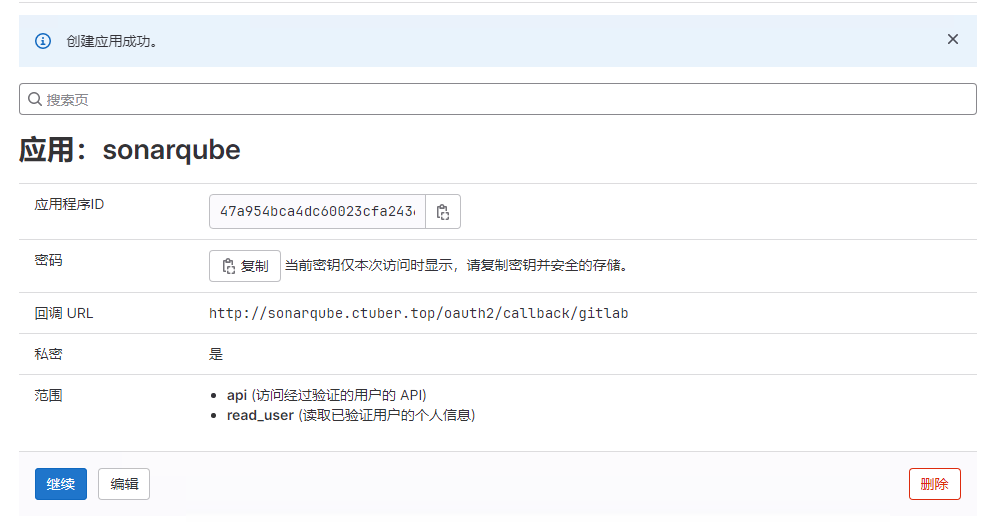
将信息进行复制,用于下边sonar的配置:
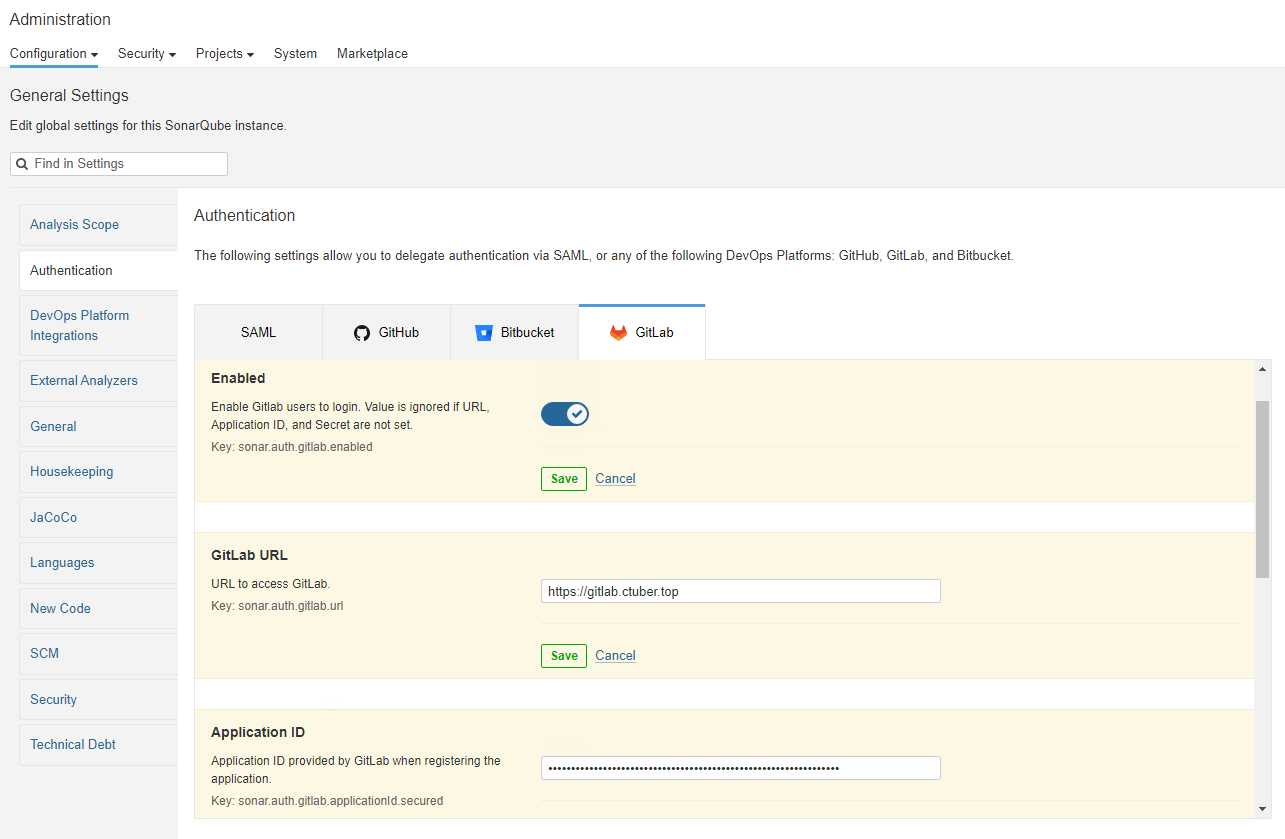
接下去我们来到sonar端进行配置:
admin账号>Administration>Configuration>Authentication>Gitlab


关于组同步:
For each GitLab group they belong to, the user will be associated to a group with the same name (if it exists) in SonarQube. If enabled, the GitLab Oauth2 application will need to provide the api scope.
可以看到sonar的描述是只有在gitlab与sonar中存在同样的group name,才会触发用户与组直接的关联关系的同步。gitlab中的组是不会直接在sonar中自动同步并创建的。此处较坑,需要自己使用gitlab与sonar的API进行同步程序的编写,待补充。
除了上述的配置之外,最后还要在admin账号>Administration>Configuration>Gneneral处
完成Server base URL的配置:
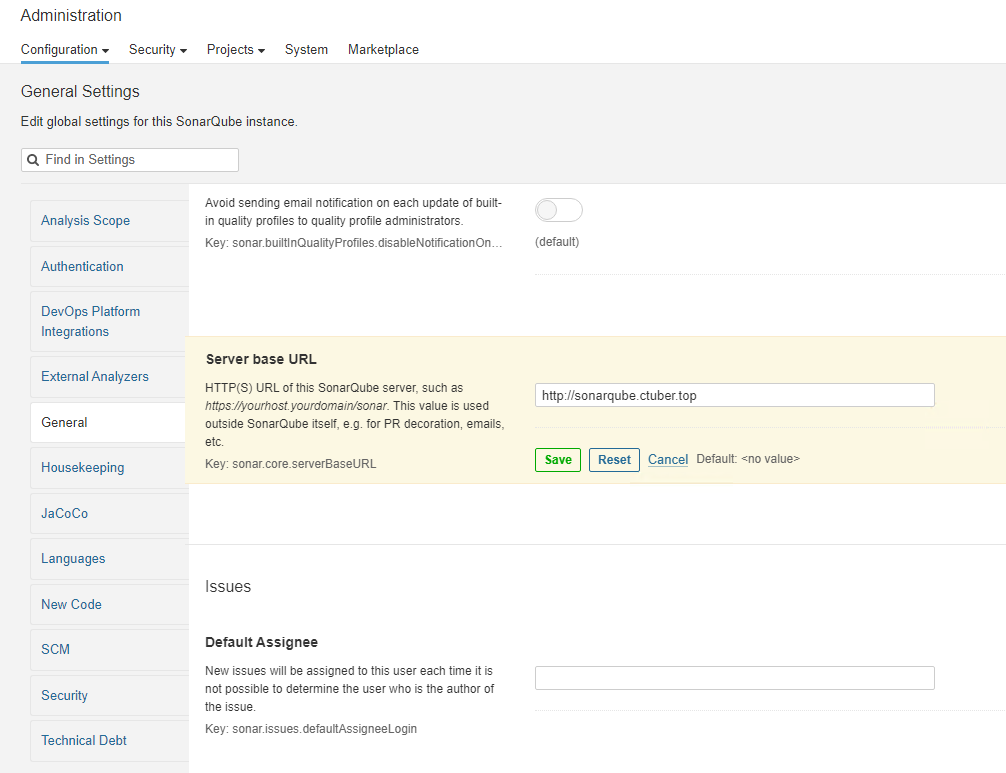
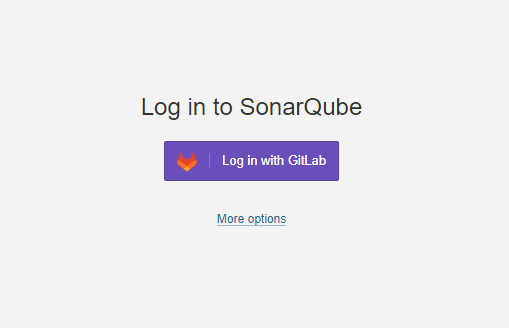
此时sonarqube就可以使用gitlab进行登录了。
二、sonarqube与gitlab的集成配置(integration)
免费版配置完成之后,能够实现sonar自动读取到相应账号账号在gitlab中的项目,将sonar的扫描嵌入至gitlab的CI。再登录至sonar查看代码质量及漏洞情况。
在merge request页面新增sonarqube的装饰,是付费版的功能。虽然用不了,但是我们在整个配置的过程中还是需要去创建对应的access token,并配置。
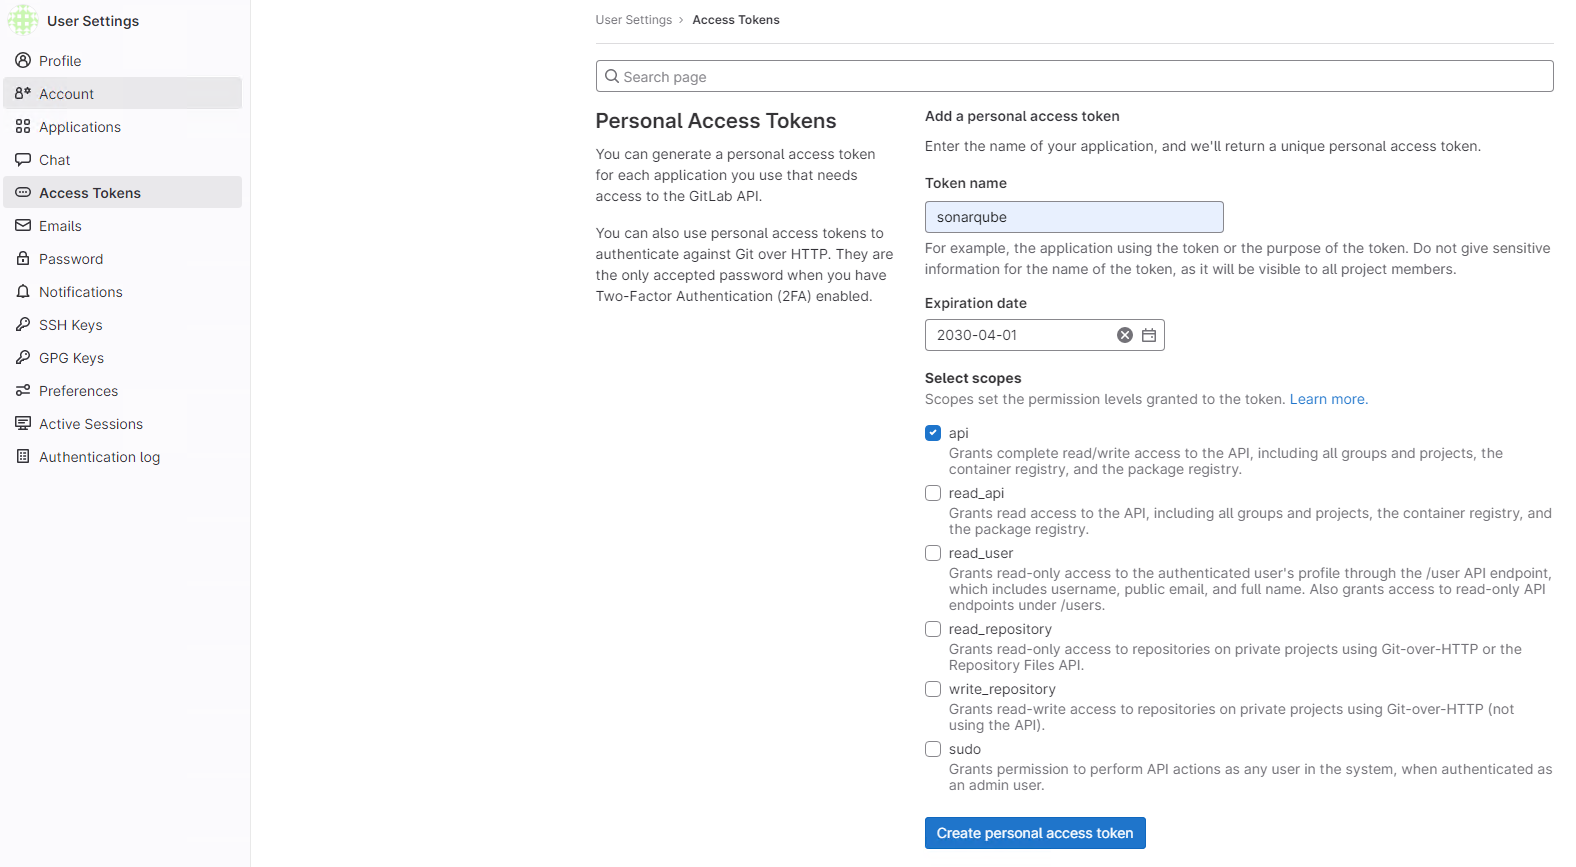
2.1 sonarqube建议创建一个独立的账号,具备Reporter的权限并能访问所有的项目,基于此账号创建一个具备api scope的Personal Access Token。这个token将在随后sonar的全局配置中用到:
此处创建新的sonarqube用户,

保留token。
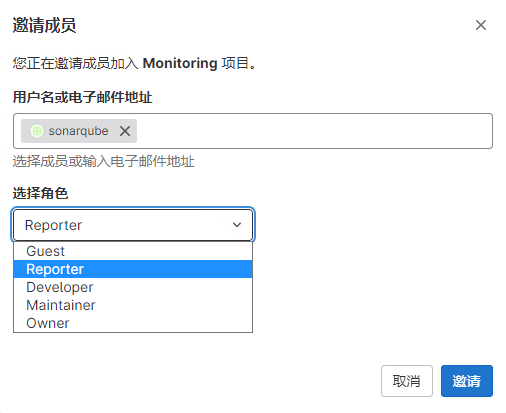
在某个项目中将sonarqube用户添加为Reporter。假如上边在创建sonarqube账号时选择作为管理员账号,则默认具有所有项目的访问权限,不需要再在项目中额外进行授权,此处从安全的角度出发,单独授权。
2.2 回到sonar进行配置
此处我先解释一下sonar的配置逻辑,我们首先需要使用管理员账号进行一个全局access token的配置,这个token主要的作用是将代码质量的状态推送至merge request/pull request,需要使用api scope。
其次个人用户在进行项目关联及导入的时候,需要配置个人的access token,此时需要read_api scope。配置完成之后你就可以在sonarqube中看到你权限下的项目,并进行配置,配置完成之后,merge request处也会看到相应的菜单,付费版功能。(Setting up your projects this way also sets your project settings for merge request decoration.)
因此,我建议全局配置可以将权限收的小一点,有就可以了,没必要给管理员权限。
access token信息较为敏感,建议参考sonar的文档,将加密配置起来,很简单的,此处不再赘述。https://docs.sonarqube.org/9.9/instance-administration/security/#settings-encryption
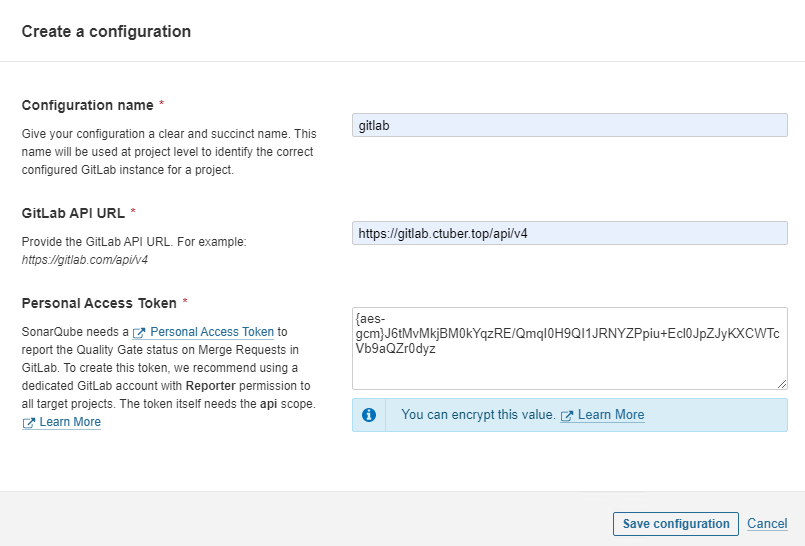
下边正式开始配置:
建议加密token,此处需要提前完成加密配置,链接就在上头。
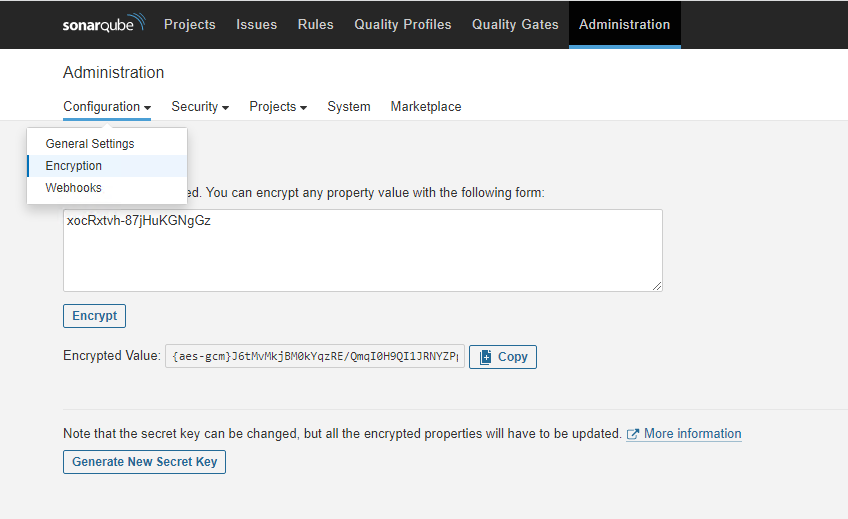
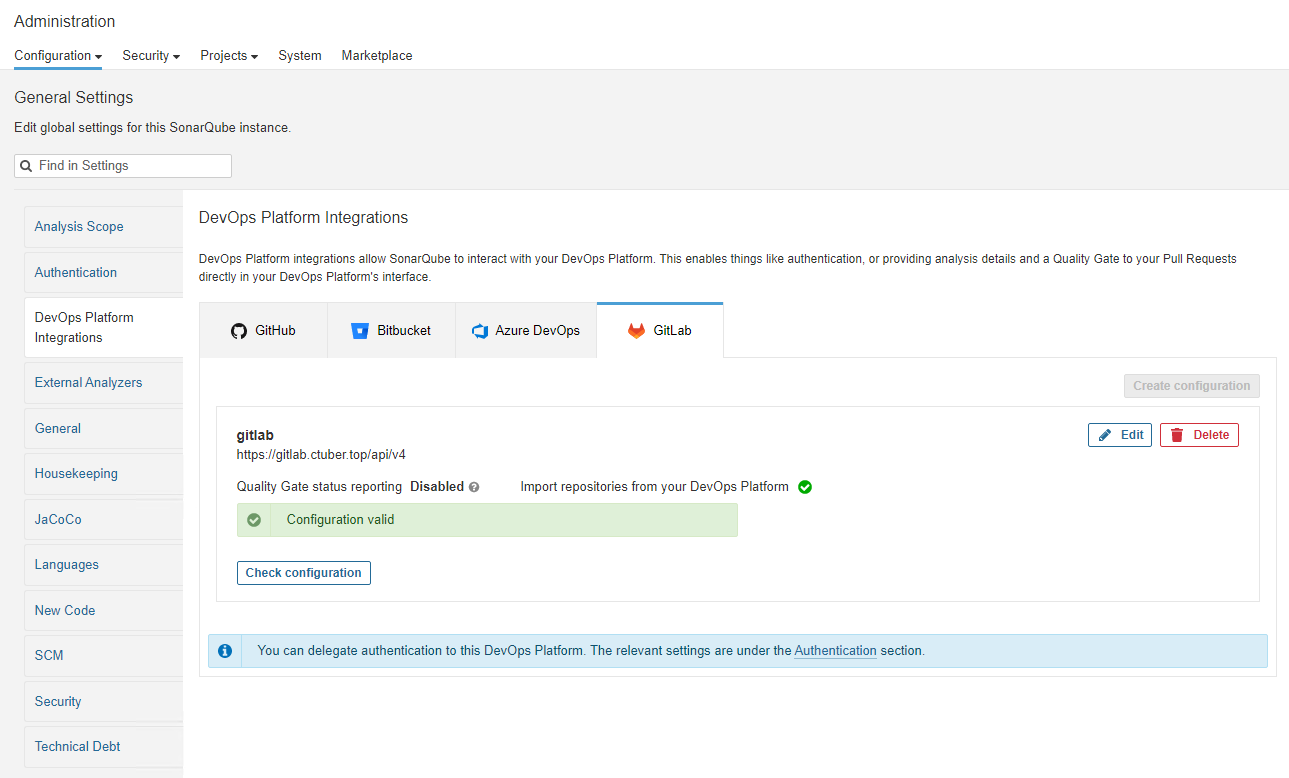
在管理员账号下进行global token setting:Administration>Configuration>DevOps Platform Integrations
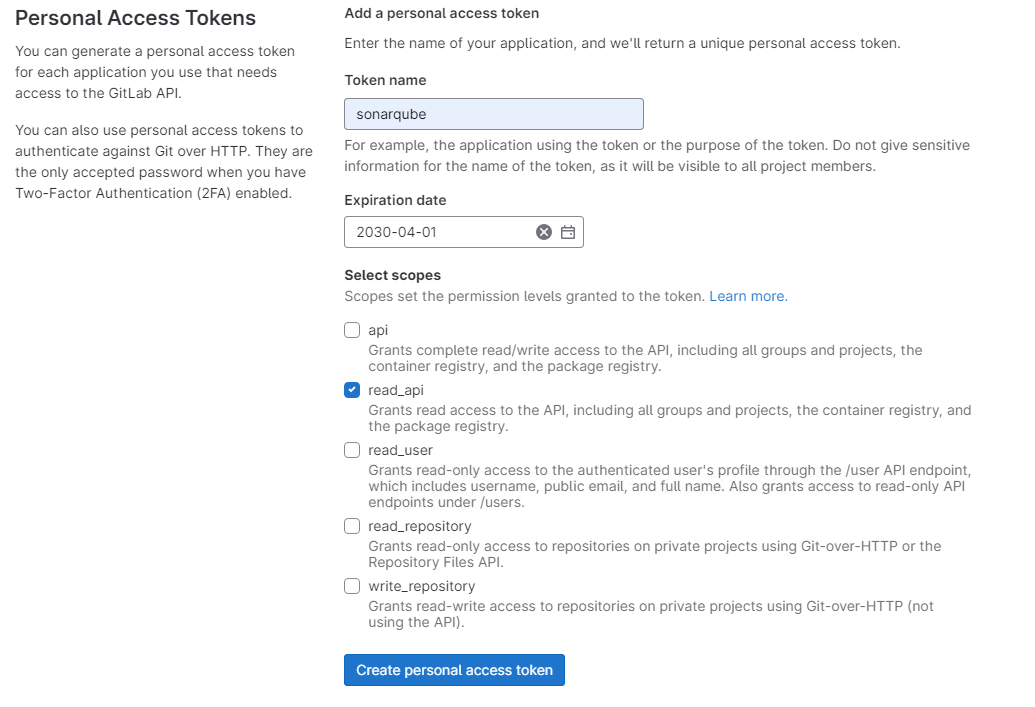
接下去将gitlab及sonarqube的账号都切换至某个普通账号:
在gitlab中再次生成access token,Preferences>Access Tokens,保存token
单点至sonarqube,进行项目导入的配置,在首页选择From Gitlab
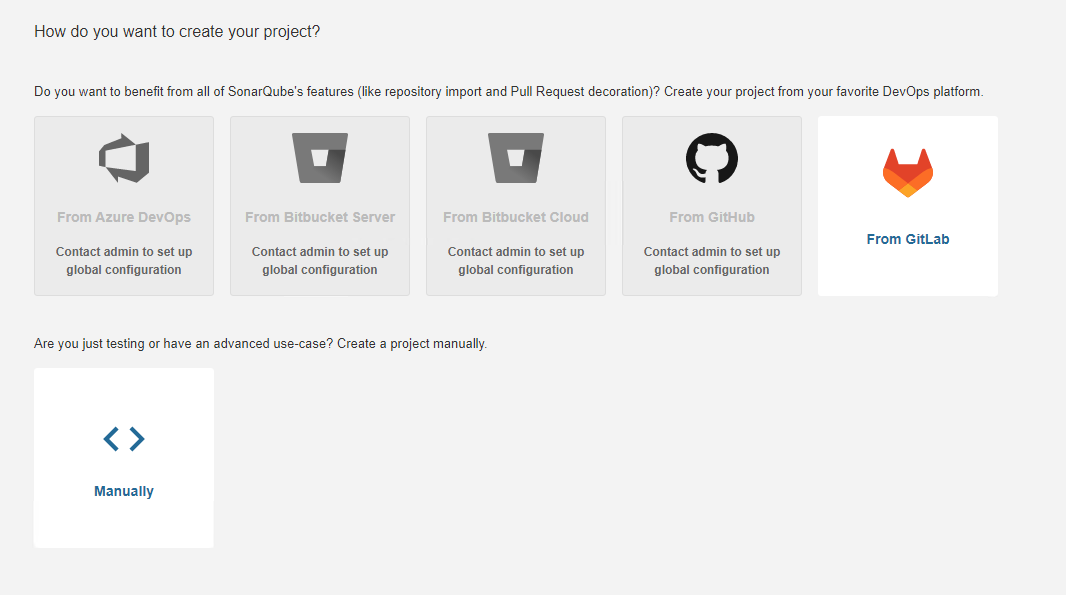
将token粘贴之后就可以看到你账号下的全部项目。
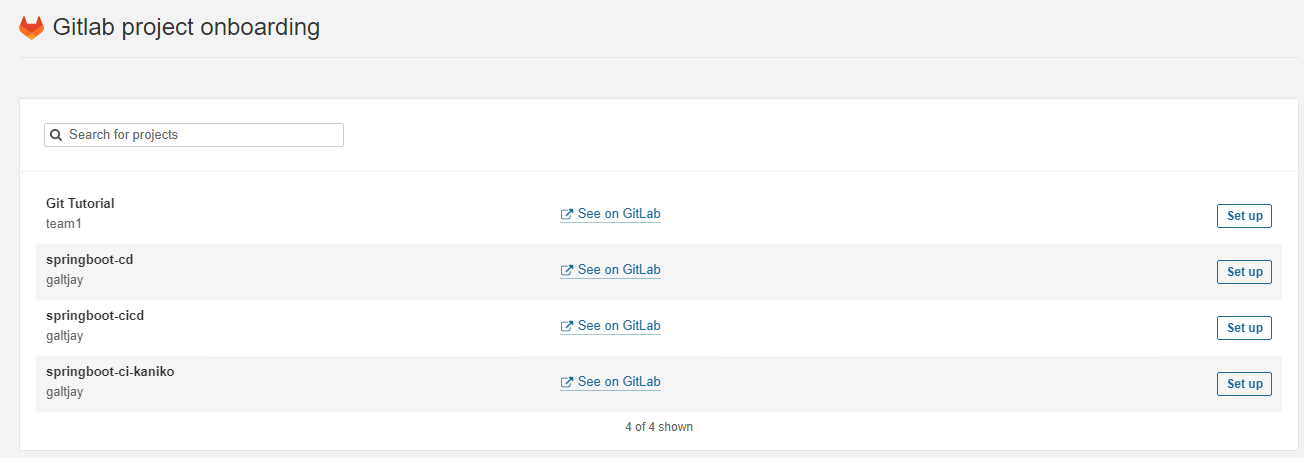
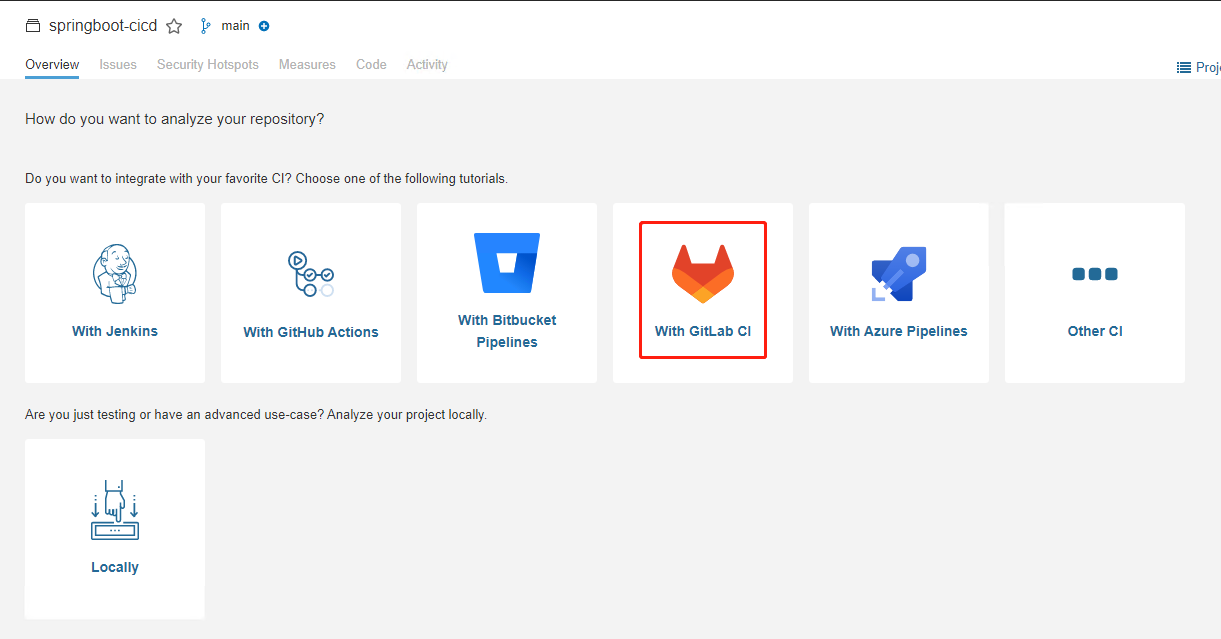
点击setup即可开始配置,此处以一个maven的项目为例,使用gitlab CI进行集成:
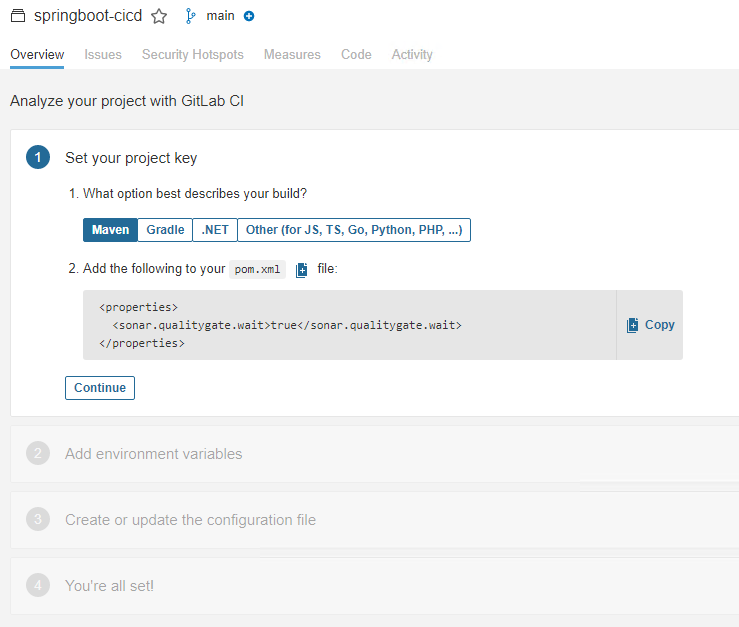
在pom.xml中添加properties:
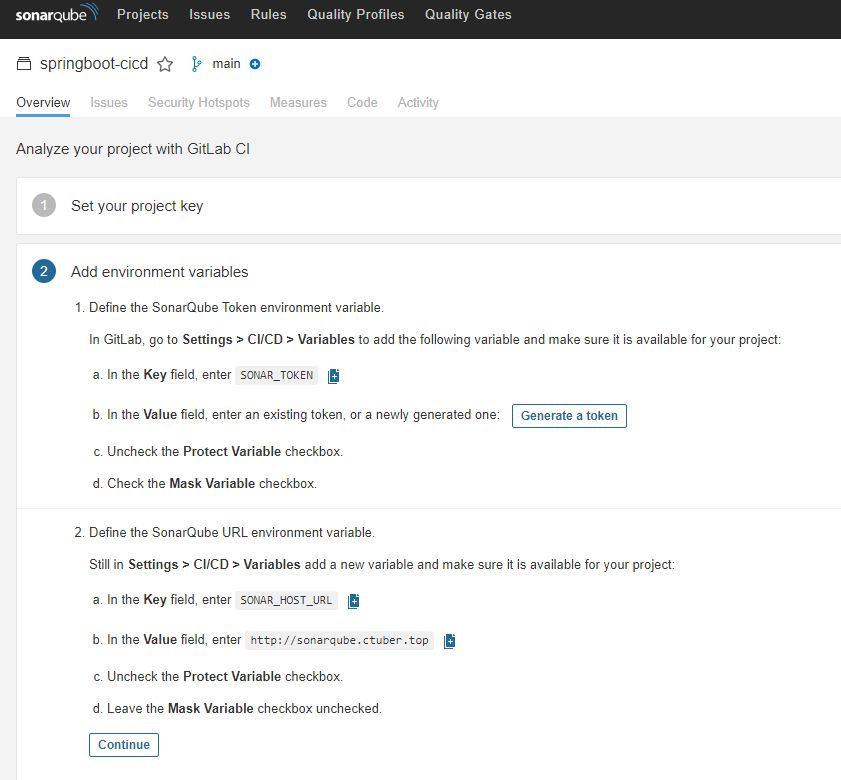
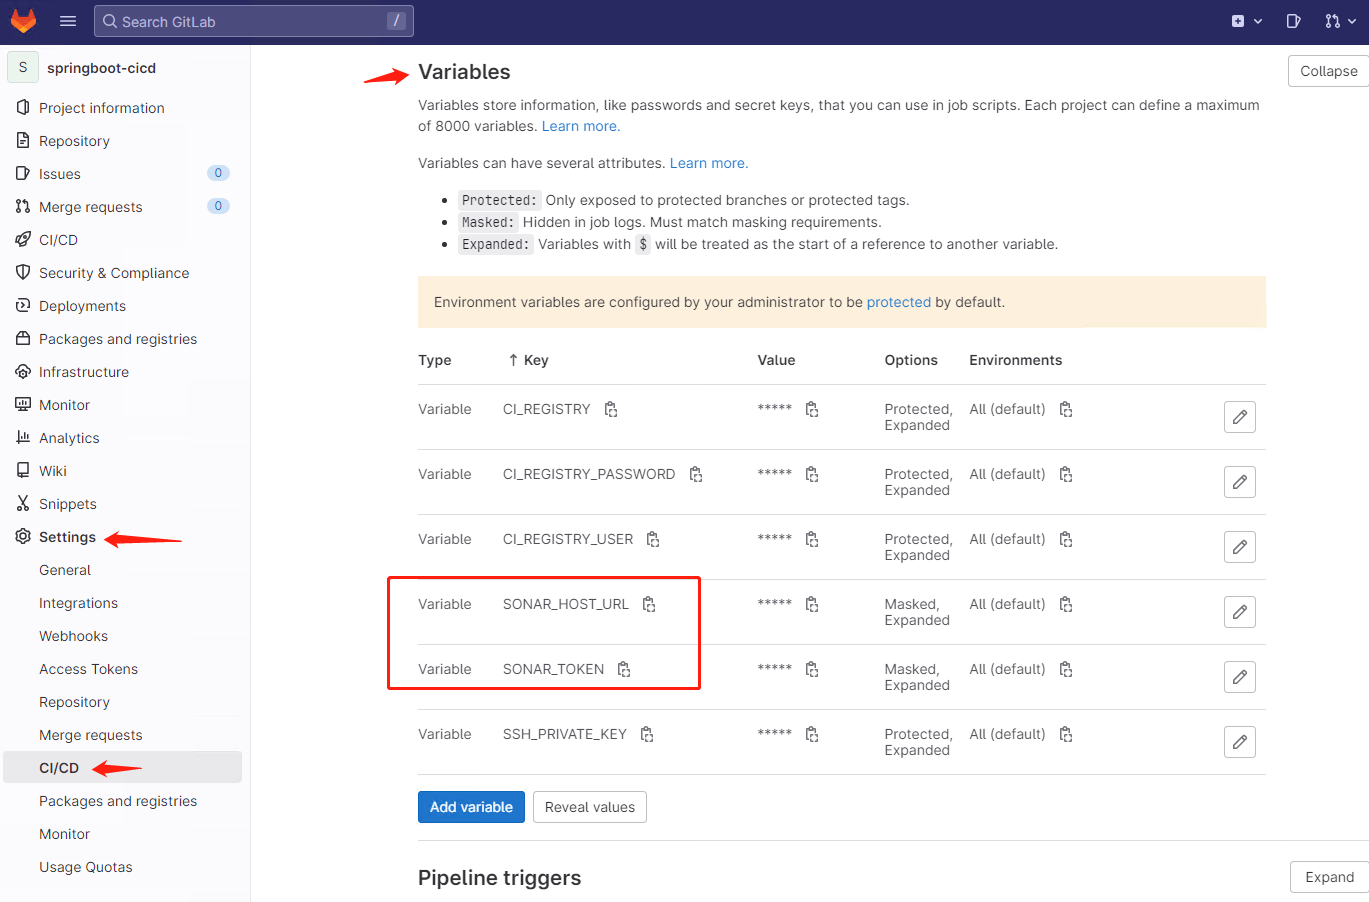
在gitlab对应的项目下添加环境变量:
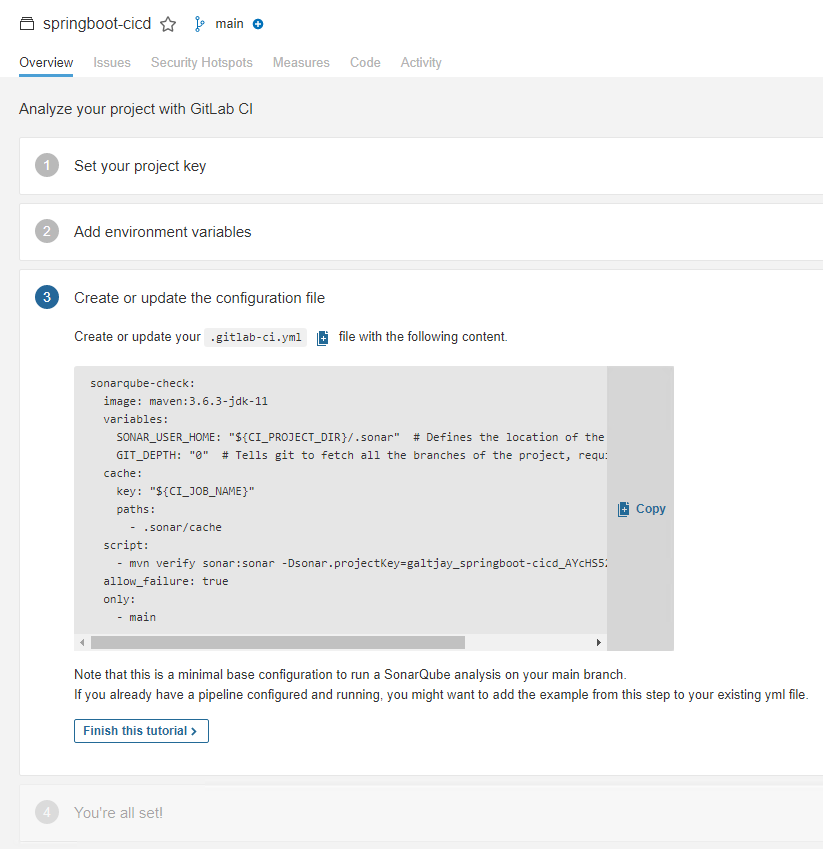
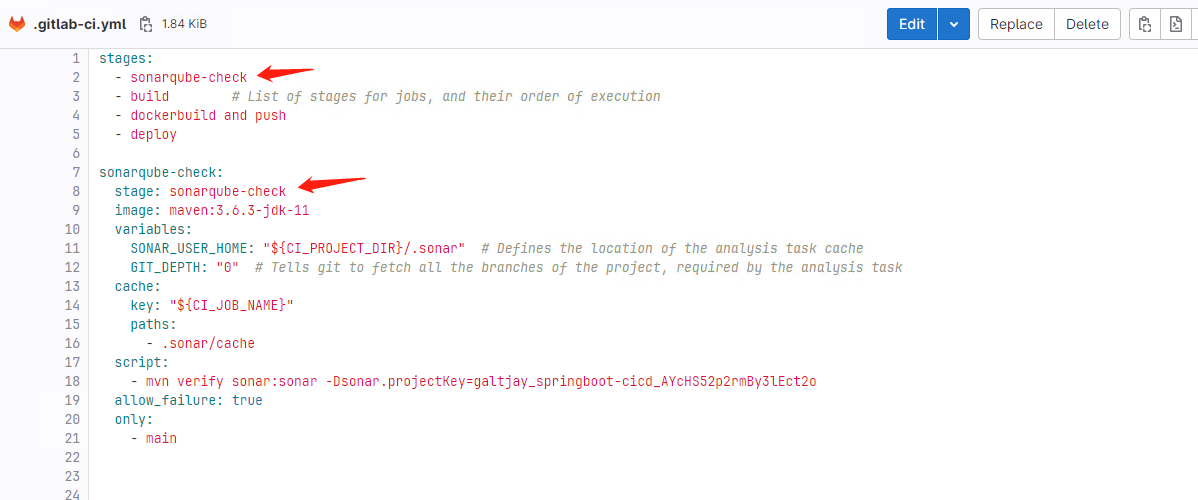
在.gitlab-ci.yml中添加对应的stage:
至此,整体的配置完成。
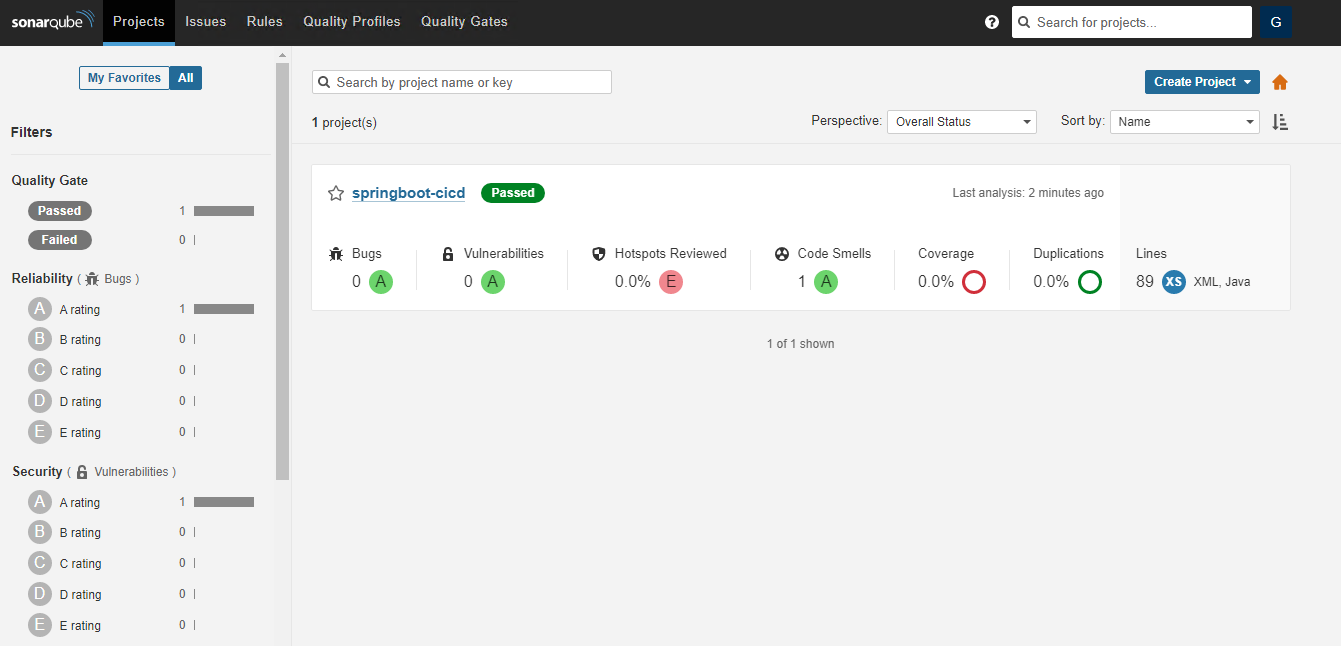
最终的效果:
最后写一下,关于sonar权限管理的问题。
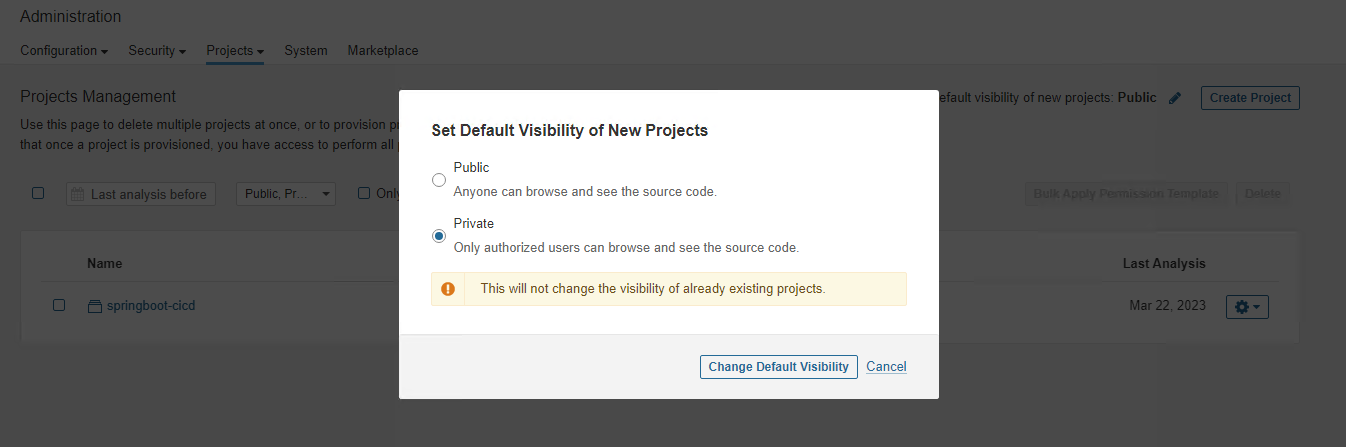
sonar默认导入的项目都是public,需要重新定义成private。Administration>Projects>Default visibility of new projects
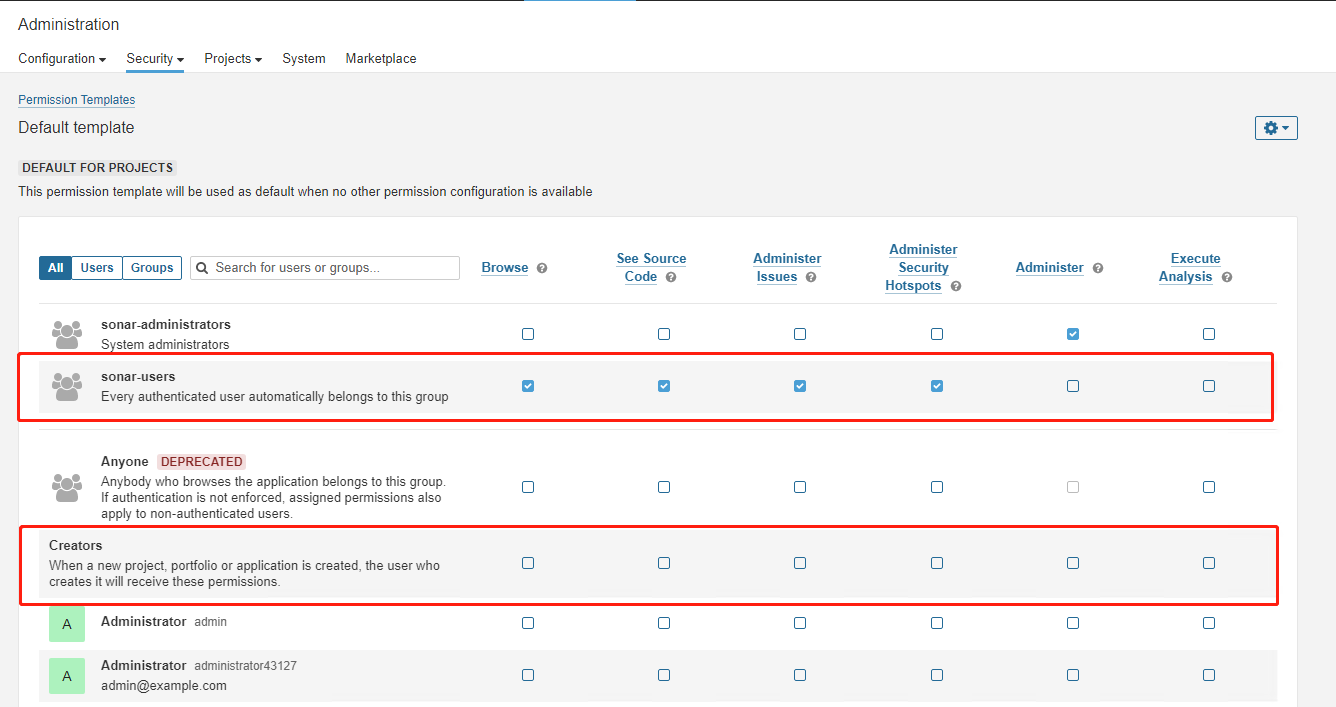
sonarqube默认将所有的用户放入至sonar-users这个group,同时将权限给的很大。我们需要将sonar-users这个组的权限降至最低。同时将权限授予给Creators,最终的效果是,谁创建或导入了项目,则对于该项目拥有管理权限,可以进行对应权限的调配。
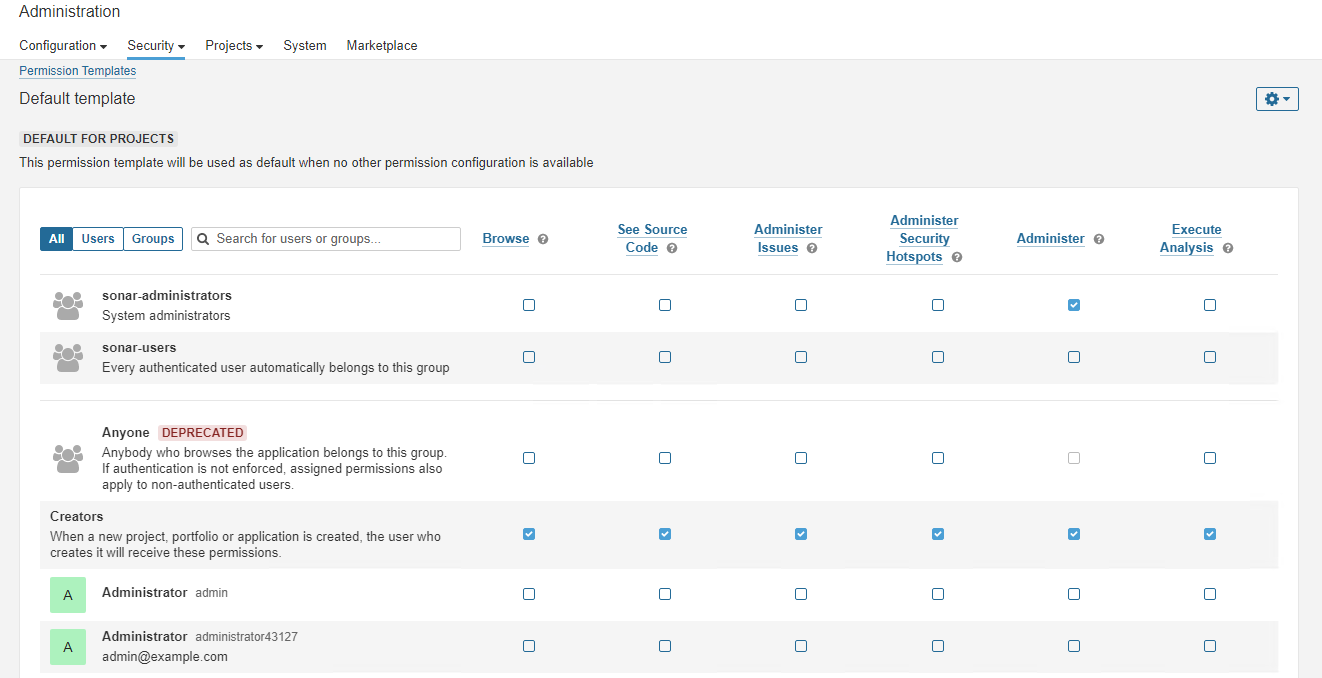
建议修改成:
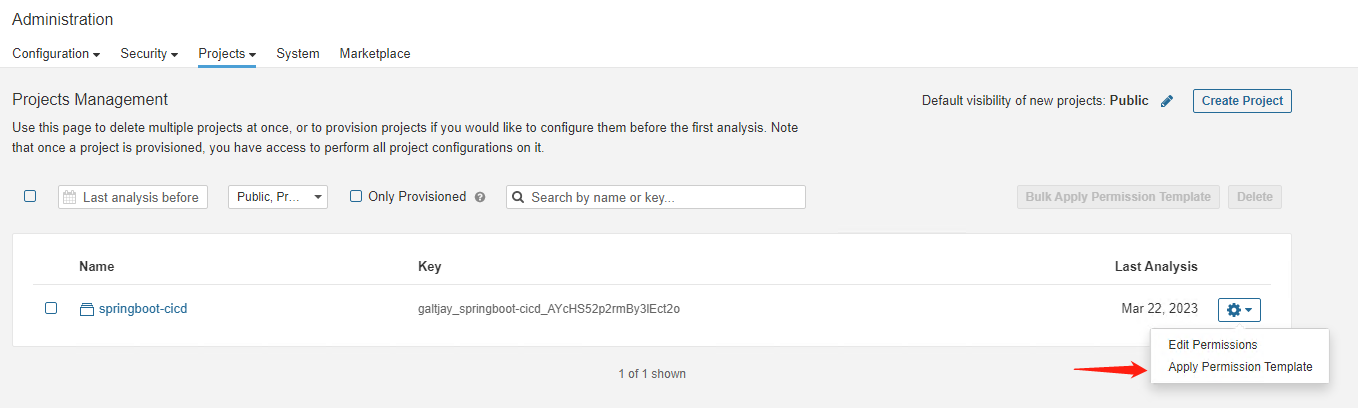
权限的模板完成修改之后,不会对于现有的项目生效,需要去项目管理菜单apply一下:
本站点维护了一个每日更新的华语youtuber的排行榜,欢迎点击收藏: https://chuizi.tech/ytrank/
留言